Showing posts with label Gentleman Skills. Show all posts

Wednesday, 9 September 2015

Why Every Man Should Know How To Sew.


The way our world seems to work now(aside from maybe cars) is that once something gets a little worn out or broken we throw it away and just buy a replacement. This could not be truer in the case of clothing.
_

Sewing and repairing clothes goes right the way back to the stone age. Sewing up clothing with bits of animal sinew.
Even in this time and age it is important to practise and use the skill of sewing and repair. 
I have a old pair of jeans that has been in my possession for a good 3-4 years and they are, I suppose, shabby. They have big holes in the knees and lots of parts are beginning to fray. But they were not cheap when I bought them. They were hand made Japanese denim, and I refuse to throw them away.

I have resewed the pocket twice, does several small stitches on cuts on the legs and (poorly) attempted to so up the bum.
_


Big cut I know.
Now many men(wrongly) believe that sewing is a job for women(that is not something I agree with). This goes back to when women stayed at home and cleaned, cooked, and did knitting. But you should never rely on someone to do something for you all the time. Sewing should not only be recognised as a manly thing(or not gender specific) but also a practical important skill.

I'm not talking about learning 17 different stitches and 4 different ways to achieve each with 5 different types of needle. Just any simple stitch that is effective in keeping the damage from opening(I'd suggest doubling up the thread). It does not have to be pretty, only functional, if you are able to sew things up, your clothes and shoes will last a lot longer saving you money and time(also lets be honest here, everyone loves a practical man).

I have a pair of sheepskin boots that had torn all the way down the right side. Because it was just sheepskin(or suede whatever you want to call it) I could sew it up really easily and it has continued for 2 years since and still going strong. 
You should always have a needle and thread even if it's just for sewing a button back onto your shirt while your out. Be secure in your masculinity, it doesn't matter if you can sew. You'll be able to fix your jacket while dim, sexist men have to go buy a whole new one.
_


_


Follow my Twitter: @strollingmen

And my Instagram: @strollingmenblog

_


- Start Being Practical -


- Louis -


Saturday, 5 September 2015

How To Survive A Job Interview.


Everyone has to have a job interview at least once in their life and they are not always a pleasant experience. There is lots of stress that comes before, during, and after.

This guide SHOULD help to make any interview you have a bit easier and reduce some of the stress that you feel around it.
_

Firstly your clothes are SUPER important. You cannot go to an interview half dressed because, however sad it may be, we make up our mind about a person, typically, within the first 7 seconds of meeting them and most of this decision is based on the way they look. Obviously that opinion can be changed, but in an interview it's important to start with a good impression.

The few most important things are:

Make sure you are either clean shaven or that whatever kind of facial hair you do have is neatly trimmed.

Make sure your hair is clean and tidy.

Your nails have recently been cut.

Whatever you wear make sure it is washed, ironed and matches well(so don't wear a navy pair of trousers with a grey blazer).

Make sure all of your clothes fit(seriously if your ankles are sticking out under your trousers it WON'T look good).

Clean whatever smart shoes you're wearing and check they aren't scuffed up.
_

For your clothes it goes down as pure common sense. Don't look like a scruff and remember it is much better to be over dressed than under.
_

Next is the first 7 seconds. 
When you come in you need to make sure your body language is right. No hands in pockets or anything that folds yourself inwards. Enter with you chest out, your head held up, and for the love of god SMILE. 
If you come in looking like a wet blanket no one is going to be interested in talking to you.
Make friendly acknowledged eye contact with all of the people in the room greet them in a clear happy voice.
_

Now your sat down and the interview is underway one key thing that is very easy to remember is DON'T LIE. If they ask you a question don't 'bend the truth' because it will come out and you will turned away immediately. 

Maintain regular eye contact and keep smiling. Have open body language and remain relaxed. Chat and talk without fear, they are just people and if you are a nervous wreck it will not do you any favours.
_

Ask any questions you have about the job, interviewers like people who can think on their feet and are able to work under pressure and find out more information. 

Up until the very second you leave the room remain as friendly and positive as possible, shake every persons hand(try to sneakily wipe your hands if they are clammy) and leave having tried to leave the best impression possible.
_

Post interview you must not sit around wondering if you have the job or not. Once you leave the room there is nothing you can do what so ever to increase your chances of getting it, worry will get you no where other than stress you out. So relax, safe in the knowledge you did your best.
_

I hope this guide will help you on your way to getting a job and just remember to just be friendly, confident and happy.


_

Follow my Twitter: @strollingmen

And my Instagram: @strollingmenblog
_


- Stay Happy And Relaxed -


- Louis -


Thursday, 27 August 2015

Mad Max Paracord Bracelet.


_

I loved the film Mad Max: Fury Road, partially because it was a brilliant film, partially because I love Tom Hardy.
_

I noticed the bracelet he wears throughout the film and wanted to make one. After looking at several videos I figured out a way to make them.
_

Apologies for the less than average photos I don't really know what was going on today.

You Will Need:

About 4 arm lengths of paracord(roughly, hold one end, measure to shoulder and repeat).

I used my swiss army knife to cut the ends but you will also need some kind of small stick. The thick end of the tooth pick works really well with that.

A means to melt the end, I used my stove.

_


_

Firstly, get your paracord and find the middle point. Bend that in half and from the bend measure it around your wrist. Pinch the length you want it to be the reduce it by about an inch.

From that point, bend each end of the cord to each side like shown.
_


_

Then move the left side over and pull the right cord so it is on top.
_


_

Put the right cord behind and back up through the left loop.
Then pull it not completely tight as you need to go through this one later on. Every knot after these are to be tight however.
It is VERY important to remember that the same cord always make the loop first. It is the cord that always crosses over the top.
_

I'll put an uninterrupted sequence here and just repeat it till you get close to the bottom remembering to keep the lead cord as the first loop, always over the top.
_


_

Pull tight each time.
_


_

Continue the tying until you get down to a point where it is very difficult to keep going but you have enough room to easily still do at least one more knot.
This point is when you will need your little stick or pokey thing to get the cord through the hole at the very bottom.

Now I must admit I am faintly confused by these photos, I was getting angry with my camera and probably should have made these clearer.

You need to put the main cord(that main loopy one) through first then push the opposite one through(It's very possible you bracelet at this point might be the other way round just reverse the instructions). You need to make sure the main loop is on top of the other one and pull each of the cords tight THROUGH the opposing ones loop once you've done that you will have tied the stopper knot.

If you don't tie a stopper knot you can easily pull every single knot off the bracelet taking it back to a massive stretch of paracord.
_


_

Once you've loosened the first two loops at the top of the bracelet use your stick like thing to push each cord through to the correct loop. 
From here, you need to put the bracelet on and note where you want to knot to be on the ropes so you can still get it on and off(do it a little tighter than you think as the rope it slightly stretchy and the knots on the bracelet will adjust).
_


_

This stopper knot is similar to the knots on the bracelet. Start it like you did on the first knot and place one cord over the top and another under the bottom.

The cord on the top is then going to go round the back and go through itself, and the cord on the bottom is going to go over the top to go through itself.

It sounds more confusing than it is.
_


 _

Pull it tight and it should look like this.

Trim off any extra cords.
_


_

Use some kind of fire to melt the tips so they can't become undone.
_

And there you have it. Your own Mad Max bracelet made with nothing but paracord.
_


_


Follow my Twitter: @strollingmen

And Instagram: @strollingmenblog

_


- Don't Go Mad -


- Louis -


Sunday, 23 August 2015

How To Clean Up A Old Knife.


_

Every now and again, you might find something knocking around in your attic or garage. Most of the time its junk. But sometimes you get something that has potential to be great.

My dad found a old scout knife and as it was rusted and dull he had no use for it and gave it to me.

The blade is sheffield steel with a brass guard around the top with leather coating the handle and it was covered in rust and paint.
_

In this post I will teach you how to(roughly) bring a knife back up to scratch.
It's actually much easier than you might think.
_

Your going to need...

Rough sand paper(I was using part of a old power sander belt)

The knife(Duh!)

At least one whet stone(i'd say for the best effects, get a 300 and 600 grit, then maybe a 1000 grit if you want it razor sharp?)

Some kind of good knife sharpener(I used my Gerber ceramic pocket sharpener)

Right, on with the instruction!
_


Firstly here is the knife.


As you can see its pretty grim. There's paint on the handle and the blade and end are rusty and dull. The blade was a lot more rusty but I had a go at it before I started photographing it.
_

1. Sand Paper.

_


This section is the one that will cause the most obvious difference. Your going to want to be somewhere you don't mind getting covered in rust so outside is great.

Rub all of the blade and any other metal sections till they shiny like sunlight(Can take a very long time especially if the blade has grooves in it).

The handle on this knife was leather and I decided I didn't care if it got a bit scuffed as long as there wasn't any paint on it anymore so I sanded that a bit as well.


Here's the knife after. And just for comparison here's the before again.


_


2. Whet Stone.

_

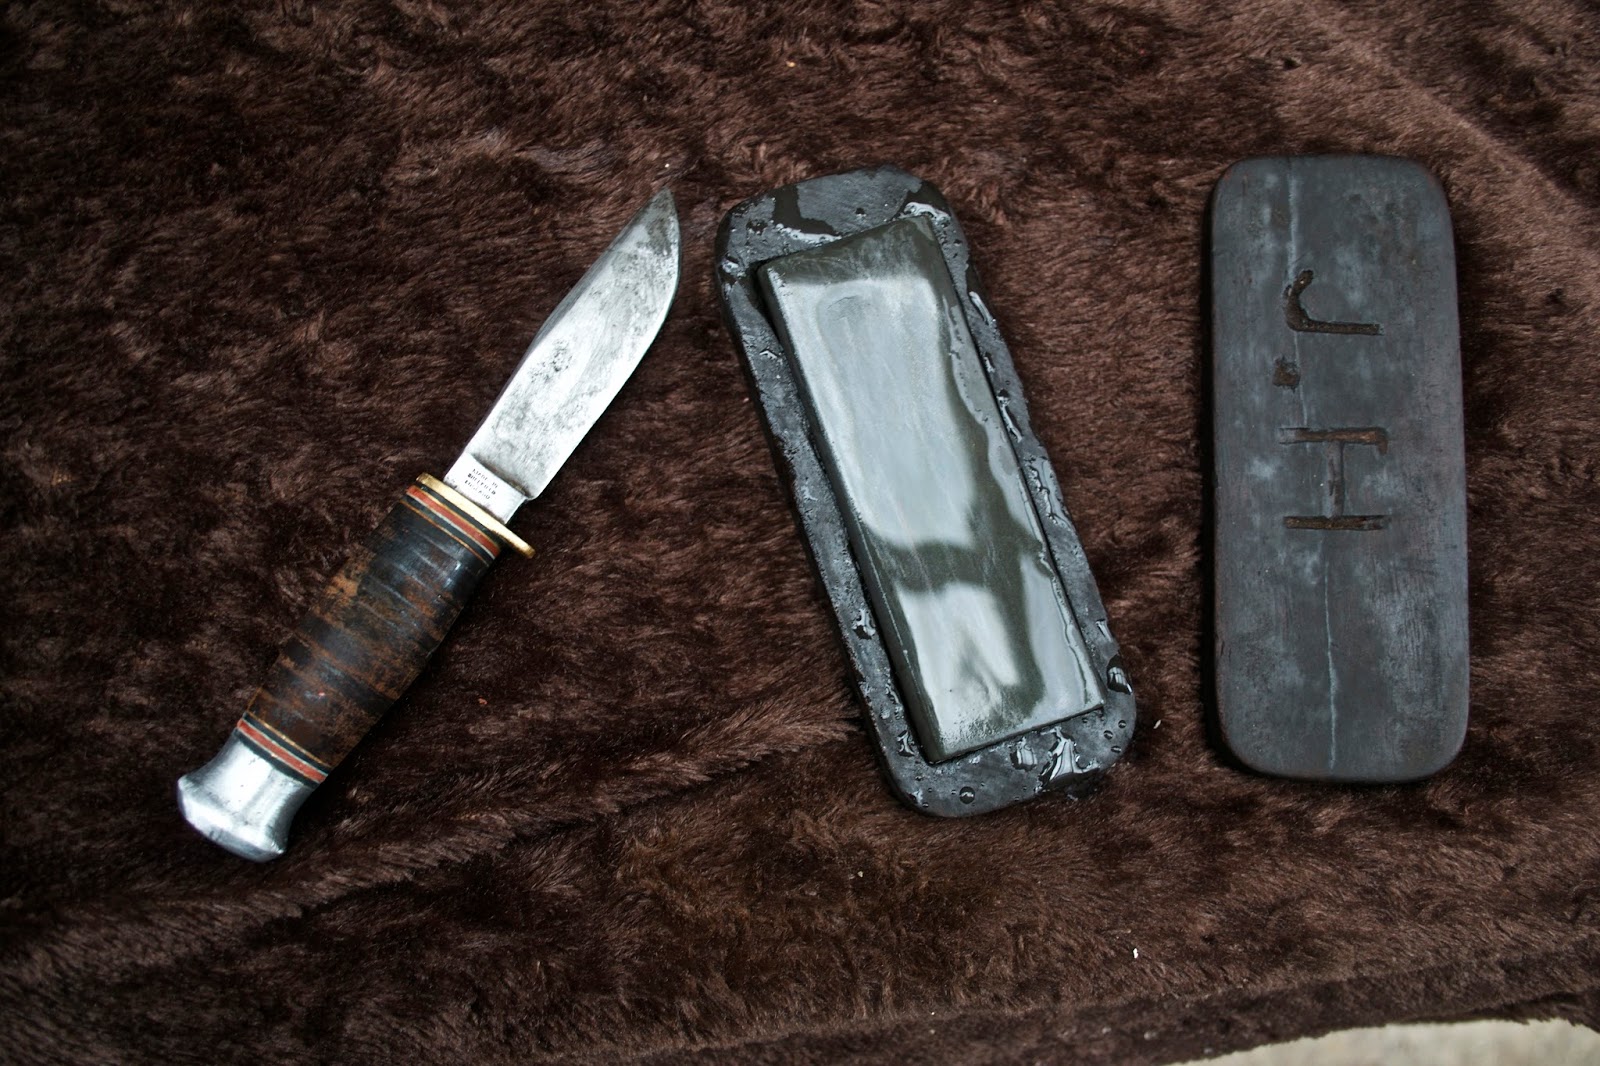
So this part your going to need a whet stone. I only had one old one to use but I've suggested the grit that you would need to make your restoration better.

Soak you whet stone in water for about 10 minutes, then using the full length of the stone and moving the blade so all of it makes contact throughout the strokes, drag the knife backwards and forwards at the angle you want you edge to be(that was as technical as I could make it I'm sorry).

Do this for about 15 minutes or so swapping the sides util you can feel more of an edge on it then move up to the next grit and repeat.


I don't know if you can really see but there is a more visible edge then before it was sharpened here's a close up.


Thats still fairly crap but oh well.

_


3. Knife Sharpen.


_

This is the final part which you don't have to do if you are very good at using a whetstones, but I thought it would be good for a final finish.

Just run your knife through as carefully as you can about 15-25 times until you think its as sharp as you want it then you're done.

_


Give the blade a wipe down to clean off any crap thats left over.
I hope this helps anyone out who's got a old knife that needs some TLC. 


_

Follow me on Twitter: @strollingmen

And Instagram: @strollingmenblog

_


- Don't Waste Old Tools -


- Louis -